
Note: This is a guest post by Keith Miyake.
Greetings, I am Keith. (Auntie) Karolyn is like my second mom. My mom’s family and Karolyn’s family go back like half a century. I grew up alongside her kids and spent a ton of time at their home. Auntie Karolyn has taught me many things about life, family, friendships, and cooking. One of my earliest memories of cooking for others was a time when I was probably about 5 or 6 and I made bacon fried rice for Auntie Karolyn, my Auntie Cherie, and my mom’s mom.
Ever since Karolyn started Foodjimoto several years ago, I have been promising to do a guest post. There have been multiple occasions when I started preparing food with the intention of posting about it, but I always come up with an excuse not to follow through.
Finally, this past winter I was back in Southern California to visit family and to get away from the nasty New York winter and I made it a point, thanks to much prodding by my partner, Emily, to schedule a time to cook with Auntie Karolyn for Foodjimoto. That was nearly six months ago, and I kept putting off writing my post.
Emily and I met in New York. She’s a native Brooklynite and will occasionally slip into her accent to prove it. She’s a huge fan of Foodjimoto and has been talking about wanting to do a guest post for years. We spent pretty much an entire day shopping and cooking so that we could put together our posts. I think I can speak for both of us when I say that we had a fabulous time in Auntie Karolyn's Kitchen.
Anyway, here’s my long overdue post on okonomiyaki.
The summer after graduating from high school, I had the privilege to go on a trip to Japan with about a dozen young adults from the California Higashi Hongonji temples. One of the most memorable meals of the trip—besides the home cooked meals at temple stays—was at an okonomiyaki-ya in Hiroshima. We went to a six to eight story building in which every floor had independently operated okonomiyaki-ya. The story our hosts told us was that each chef prepared their okonomiyaki differently, but all of them were masters of their craft so superlatives like “best” were completely subjective. Apparently, okonomiyaki roughly translates to “as you like it” or something along those lines. I don’t speak Japanese (other than food words) so I might just be spreading lies. But the point is, when you make okonomiyaki, you can change it up however you want to suit your palette and the things you have in your kitchen. Brilliant.
Before I moved to NY, I used to make okonomiyaki at least a few times per year, always varying the style since I like to try different things. My tendency is usually to do a Hiroshima style okonomiyaki, which is sort of like a crepe topped with fried goodness, but if I have one of those frozen seafood mixes in the freezer (with the squid, octopus, shrimp, oysters, and clams) then I’ll mix some of that in and do Osaka style okonomiyaki, which is more like an omelete or egg foo yung.
The batter is the base of okonomiyaki, and there are as many variations on the batter as there are variations on toppings/fillings. When I went shopping I found fresh nagaimo, which is like a long slimy yam similar to yamaimo. It’s not necessary, and you can find a lot of recipes that don’t use it, but I like it because it gives the batter a really nice texture. You can also try things like grated apple, taro, or even cassava. There is a J-dorama called Teppan Shoujo Akane, or Teppan Girl, in which the protagonist is on a mission to develop her own style of okonomiyaki to fill her father’s shoes as the top okonomiyaki chef in Japan. The show was mediocre, but it gave me lots of inspiration to experiment with different ingredients and develop my own style okonomiyaki.
The recipe that follows is for my take on Hiroshima style okonomiyaki. If you want to try Osaka style, beat an egg into the batter and mix in the cabbage, bean sprouts, meats, and anything else you like, then spoon this mix onto the griddle and cook like an omelet.
In a small bowl or measuring cup, add the hondashi powder to the water and mix. The hondashi powder might not dissolve. That’s fine.
Put the mochiko and flour into a mixing bowl. Incorporate the dashi and then begin adding the grated nagaimo a couple tablespoons at a time. Mix as you go. You want the batter to be runny—much more so than pancake batter, similar to crepe batter, but not watery. I’m really bad about measuring things and usually just do it by texture, so I’m not sure how much nagaimo you should be adding. If you add all of it and it’s too thick, add a bit of water. If the batter is watery, just add a bit more flour or mochiko. Flour will make it heavier, mochiko will make it lighter, but also more likely not to gel together when you cook it, so use your judgement as to how much/which to add.
Heat a griddle or large skillet to “hot”. We used one of those old school cast steel electric griddles that are amazing for making pancakes. I don’t remember exactly what temperature we set it, but something around 400F - 450F is probably good. If you are using the stove, get your skillet nice and hot to where a water droplet will float around.
When the griddle is up to temperature, lightly oil the griddle with some high-temperature oil (not olive oil) and use a paper towel to spread it out.
Use a ladle to spoon about 1/4c. of batter onto the griddle. Use the backside of the ladle to spread the batter out, crepe style. I recommend doing this off to one side of the griddle and not directly in the middle since you will want room to flip it.
Pile a generous handful of shredded cabbage on top of the batter. I said a cup per serving in the ingredients list, but I probably use more than that since I have big hands and literally use a handful. Follow the cabbage by a layer of yakisoba—about half a “brick” if you’re using the prepackaged kind. Top the noodles with a few slices of pork belly. Some people like to add moyashi in addition to the cabbage, but I don’t like it as much, and since okonomiyaki is as *I* like it, I didn’t add any. But feel free to experiment with different ingredients.
Let the pile cook for several minutes until the batter begins to brown on the bottom. The cabbage should also be cooking a bit.
Using two spatulas (I prefer the wide-faced type designed specifically for this purpose), one on either side of the pile, get under the batter and flip everything over so that the pork belly is on the bottom. Let this cook for another few minutes until the pork belly looks cooked through and most, if not all, of the fat is rendered so that it’s not chewy.
When the pork belly looks cooked to your liking, crack an egg onto the empty side of the griddle and use a spatula to break the yolk and spread the egg evenly into a round, roughly the same size as the okonomiyaki pile.
Before the egg has a chance to set, use your two spatulas again to pick up the whole okonomiyaki pile and set it on top of the egg, crepe-side up, producing a sort of crepe-egg sandwich. Let it cook for another few seconds so the egg can fuse with everything else, but don’t let it cook so long that the egg becomes rubbery.
Use the spatulas to remove everything from the griddle and flip it onto a plate, crepe-side down. Top with a generous amount of Kewpie and okonomiyaki sauce. Both bottles should come with a small squirt opening. I like to use these to create a cross-hatch pattern all the way across the top of the okonomiyaki. Add some benishoga and scallions for a little zing.
Finally, sprinkle generous amounts of katsuobushi and tororo kombu on top. Watch in amazement as both the katsuobushi and kombu dance from the steam. Fun!
Enjoy with cold sake or beer. Seriously, the saltiness and oiliness go perfectly with cold sake or beer.
Namu amida butsu, itadakimasu!
Greetings, I am Keith. (Auntie) Karolyn is like my second mom. My mom’s family and Karolyn’s family go back like half a century. I grew up alongside her kids and spent a ton of time at their home. Auntie Karolyn has taught me many things about life, family, friendships, and cooking. One of my earliest memories of cooking for others was a time when I was probably about 5 or 6 and I made bacon fried rice for Auntie Karolyn, my Auntie Cherie, and my mom’s mom.
Ever since Karolyn started Foodjimoto several years ago, I have been promising to do a guest post. There have been multiple occasions when I started preparing food with the intention of posting about it, but I always come up with an excuse not to follow through.
Finally, this past winter I was back in Southern California to visit family and to get away from the nasty New York winter and I made it a point, thanks to much prodding by my partner, Emily, to schedule a time to cook with Auntie Karolyn for Foodjimoto. That was nearly six months ago, and I kept putting off writing my post.
Emily and I met in New York. She’s a native Brooklynite and will occasionally slip into her accent to prove it. She’s a huge fan of Foodjimoto and has been talking about wanting to do a guest post for years. We spent pretty much an entire day shopping and cooking so that we could put together our posts. I think I can speak for both of us when I say that we had a fabulous time in Auntie Karolyn's Kitchen.
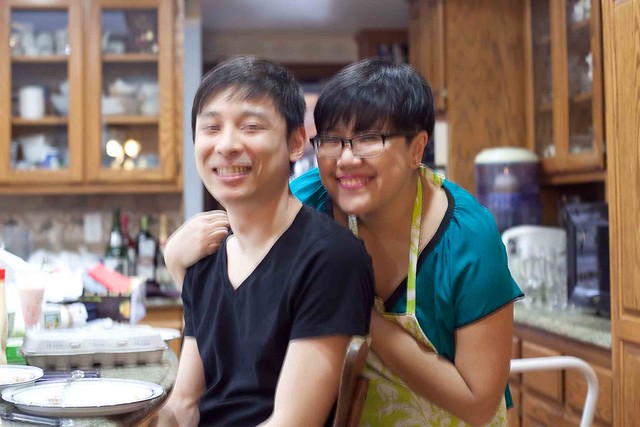 |
| Shaky picture of me and Emily. I probably said something stupid that made Auntie Karolyn laugh so her hand was shaking when she took this picture. |
Anyway, here’s my long overdue post on okonomiyaki.
The summer after graduating from high school, I had the privilege to go on a trip to Japan with about a dozen young adults from the California Higashi Hongonji temples. One of the most memorable meals of the trip—besides the home cooked meals at temple stays—was at an okonomiyaki-ya in Hiroshima. We went to a six to eight story building in which every floor had independently operated okonomiyaki-ya. The story our hosts told us was that each chef prepared their okonomiyaki differently, but all of them were masters of their craft so superlatives like “best” were completely subjective. Apparently, okonomiyaki roughly translates to “as you like it” or something along those lines. I don’t speak Japanese (other than food words) so I might just be spreading lies. But the point is, when you make okonomiyaki, you can change it up however you want to suit your palette and the things you have in your kitchen. Brilliant.
Before I moved to NY, I used to make okonomiyaki at least a few times per year, always varying the style since I like to try different things. My tendency is usually to do a Hiroshima style okonomiyaki, which is sort of like a crepe topped with fried goodness, but if I have one of those frozen seafood mixes in the freezer (with the squid, octopus, shrimp, oysters, and clams) then I’ll mix some of that in and do Osaka style okonomiyaki, which is more like an omelete or egg foo yung.
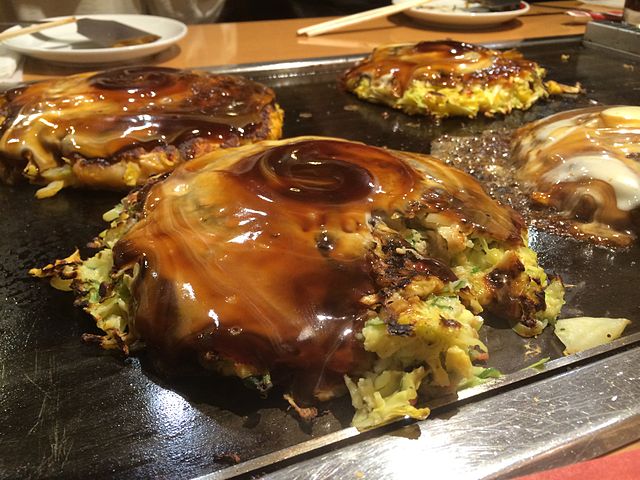 |
| Omelet-like Osaka style okonomiyaki |
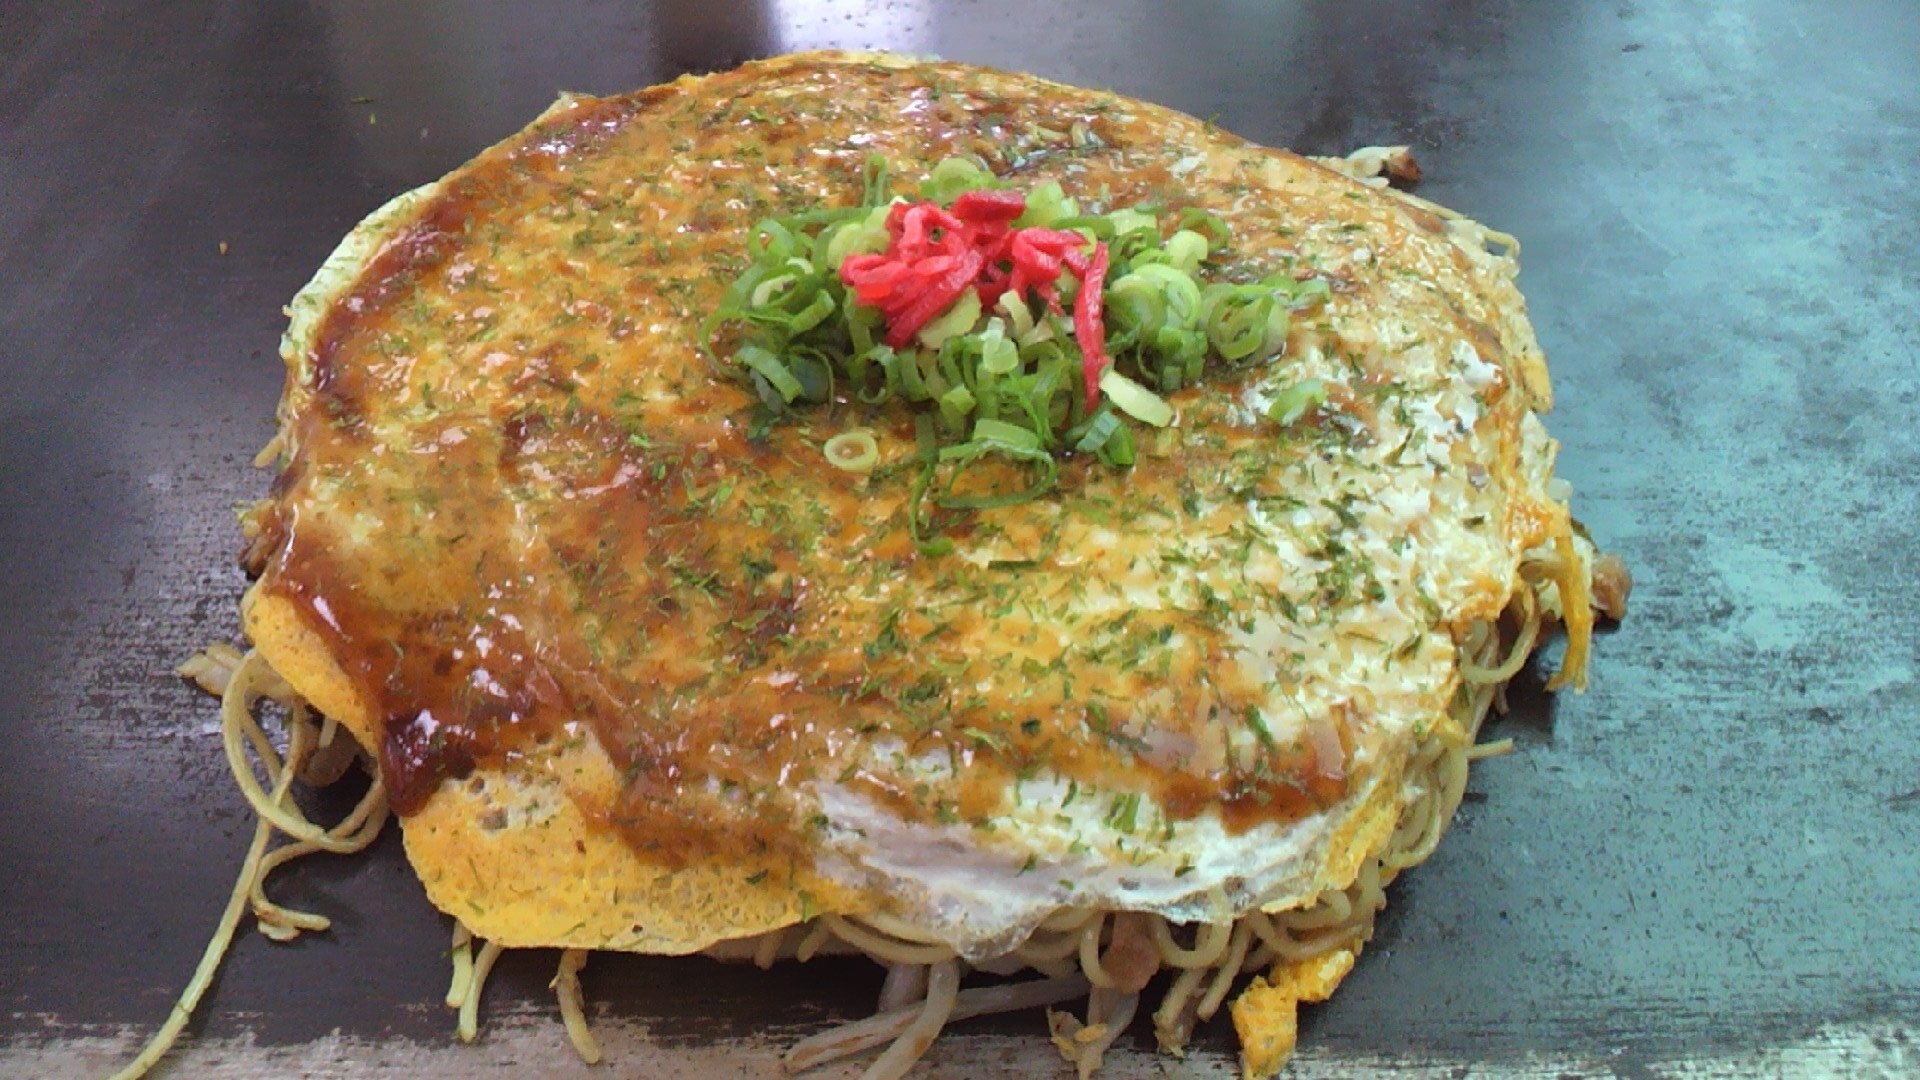 |
| Crap on a crepe, a.k.a. Hiroshima style okonomiyaki |
The batter is the base of okonomiyaki, and there are as many variations on the batter as there are variations on toppings/fillings. When I went shopping I found fresh nagaimo, which is like a long slimy yam similar to yamaimo. It’s not necessary, and you can find a lot of recipes that don’t use it, but I like it because it gives the batter a really nice texture. You can also try things like grated apple, taro, or even cassava. There is a J-dorama called Teppan Shoujo Akane, or Teppan Girl, in which the protagonist is on a mission to develop her own style of okonomiyaki to fill her father’s shoes as the top okonomiyaki chef in Japan. The show was mediocre, but it gave me lots of inspiration to experiment with different ingredients and develop my own style okonomiyaki.
The recipe that follows is for my take on Hiroshima style okonomiyaki. If you want to try Osaka style, beat an egg into the batter and mix in the cabbage, bean sprouts, meats, and anything else you like, then spoon this mix onto the griddle and cook like an omelet.
Hiroshima-style Okonomiyaki
Ingredients
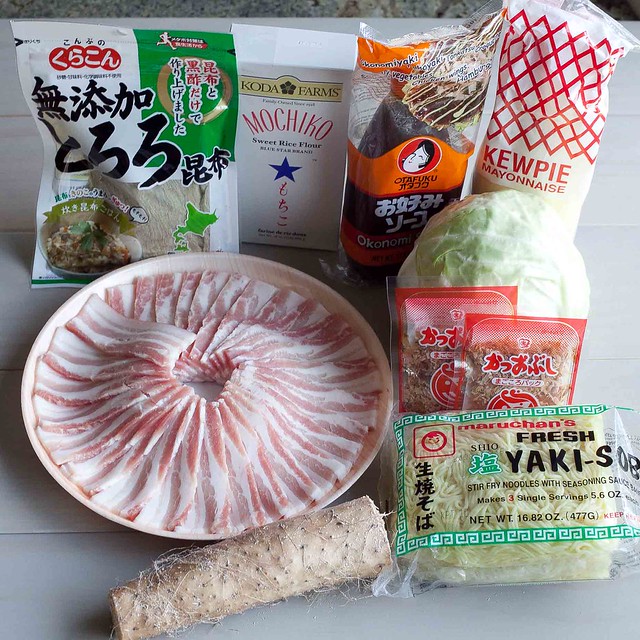
- 3-4in. piece of fresh nagaimo
- sliced pork belly (2-4 slices per serving)
- 1/2c. mochiko (sweet rice flour)
- 1/2c. all-purpose flour
- 1/2c. lukewarm water
- 2t. hondashi powder (fish stock)
- 1c. shredded cabbage per serving (or more since it cooks down)
- tororo kombu (a healthy 3-finger pinch per serving)
- 1 egg per serving
- pre-cooked yakisoba noodles, cooked ramen noodles, etc.
- mayonaise, preferably Kewpie or similar sweet Japanese mayonaise
- okonomiyaki sauce, tonkatsu sauce, or ketchup/worchester sauce mix
- katsuobushi (dried bonito flakes)
- benishoga to taste
- chopped scallions for flare
Directions
Rinse off the sawdust from the nagaimo and peel the first few inches with a veggie peeler or pairing knife. Cut off the end and discard. Grate the peeled part of the nagaimo very finely with a ginger grater, if you have one. A grating microplane or a small-hole cheese grater will also probably work. The grated nagaimo will be slimy and will make the batter gooey and runny. Middle school me would probably insert a dirty joke here, but now that I’m older I’ll pretend like I resisted the urge.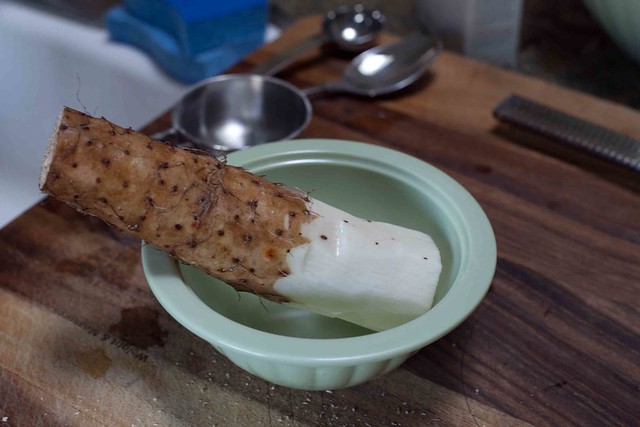 |
| A few inches of nagaimo, ready to be grated. We couldn't find the ginger grater after searching for 10 minutes so we used the microplane pictured on the right side of the image. |
In a small bowl or measuring cup, add the hondashi powder to the water and mix. The hondashi powder might not dissolve. That’s fine.
Put the mochiko and flour into a mixing bowl. Incorporate the dashi and then begin adding the grated nagaimo a couple tablespoons at a time. Mix as you go. You want the batter to be runny—much more so than pancake batter, similar to crepe batter, but not watery. I’m really bad about measuring things and usually just do it by texture, so I’m not sure how much nagaimo you should be adding. If you add all of it and it’s too thick, add a bit of water. If the batter is watery, just add a bit more flour or mochiko. Flour will make it heavier, mochiko will make it lighter, but also more likely not to gel together when you cook it, so use your judgement as to how much/which to add.
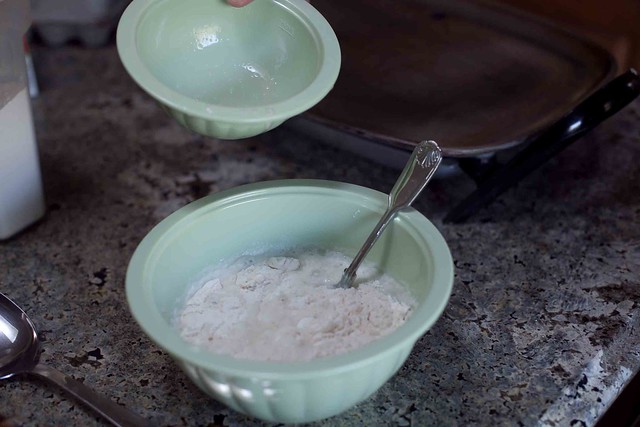 |
| Add the nagaimo and hondashi to the flour and combine. I should have waited until we got the right consistency before taking the picture, but oh well. Shoganai. |
Heat a griddle or large skillet to “hot”. We used one of those old school cast steel electric griddles that are amazing for making pancakes. I don’t remember exactly what temperature we set it, but something around 400F - 450F is probably good. If you are using the stove, get your skillet nice and hot to where a water droplet will float around.
When the griddle is up to temperature, lightly oil the griddle with some high-temperature oil (not olive oil) and use a paper towel to spread it out.
Use a ladle to spoon about 1/4c. of batter onto the griddle. Use the backside of the ladle to spread the batter out, crepe style. I recommend doing this off to one side of the griddle and not directly in the middle since you will want room to flip it.
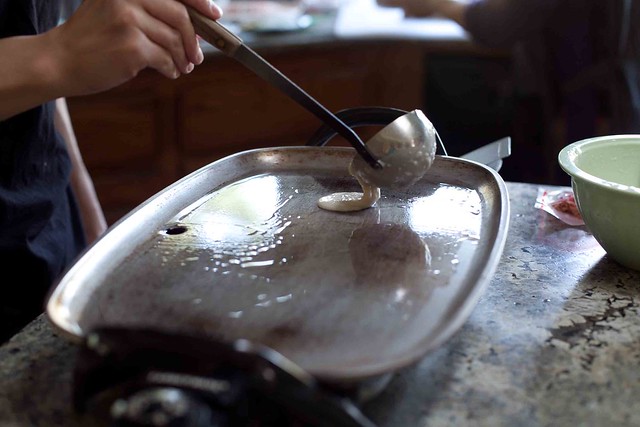 |
| Ladle the batter onto the griddle and then use the ladle to spread the batter into a thin, crepe-like shape. |
Pile a generous handful of shredded cabbage on top of the batter. I said a cup per serving in the ingredients list, but I probably use more than that since I have big hands and literally use a handful. Follow the cabbage by a layer of yakisoba—about half a “brick” if you’re using the prepackaged kind. Top the noodles with a few slices of pork belly. Some people like to add moyashi in addition to the cabbage, but I don’t like it as much, and since okonomiyaki is as *I* like it, I didn’t add any. But feel free to experiment with different ingredients.
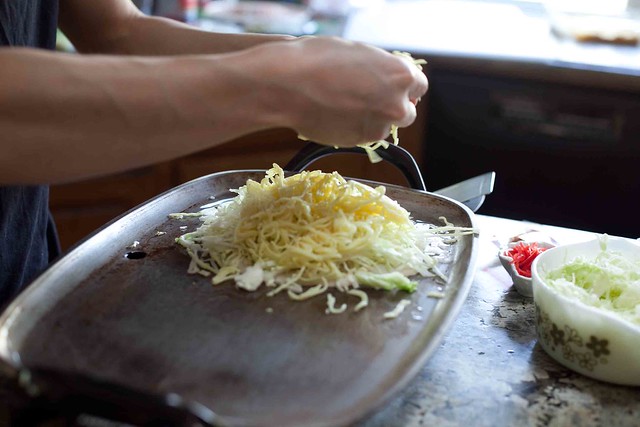 |
| You probably want to use more cabbage than this. This is kind of weak. |
Let the pile cook for several minutes until the batter begins to brown on the bottom. The cabbage should also be cooking a bit.
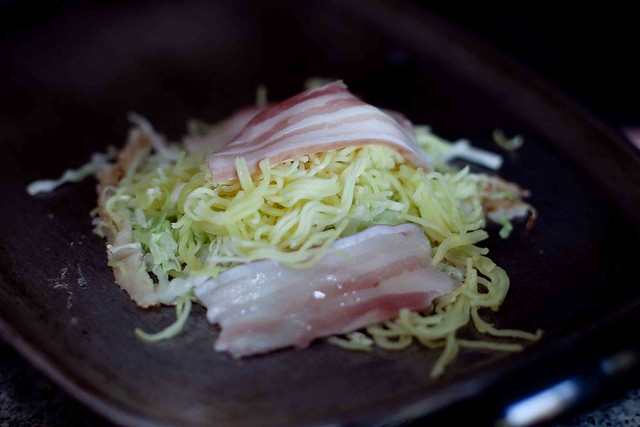 |
| Pork belly is yummy. |
Using two spatulas (I prefer the wide-faced type designed specifically for this purpose), one on either side of the pile, get under the batter and flip everything over so that the pork belly is on the bottom. Let this cook for another few minutes until the pork belly looks cooked through and most, if not all, of the fat is rendered so that it’s not chewy.
When the pork belly looks cooked to your liking, crack an egg onto the empty side of the griddle and use a spatula to break the yolk and spread the egg evenly into a round, roughly the same size as the okonomiyaki pile.
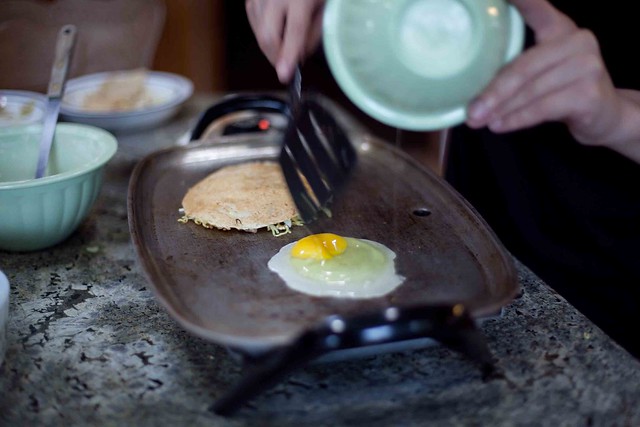 |
| Crack the egg onto the griddle and use a spatula to break the yolk, then spread the egg out to approximately the same size/shape as your okonomiyaki pile. |
Before the egg has a chance to set, use your two spatulas again to pick up the whole okonomiyaki pile and set it on top of the egg, crepe-side up, producing a sort of crepe-egg sandwich. Let it cook for another few seconds so the egg can fuse with everything else, but don’t let it cook so long that the egg becomes rubbery.
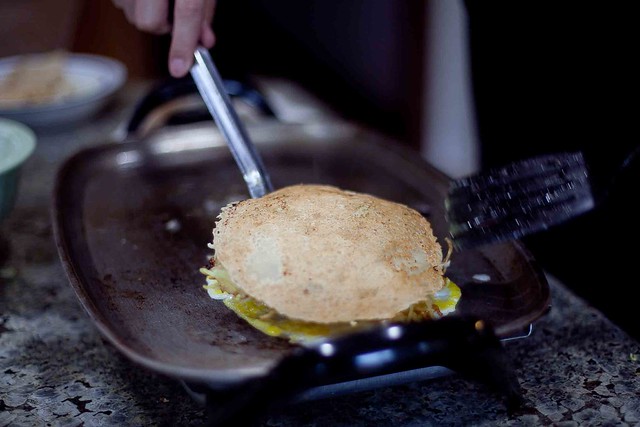 |
| Transferring the okonomiyaki onto the still-soft egg. |
Use the spatulas to remove everything from the griddle and flip it onto a plate, crepe-side down. Top with a generous amount of Kewpie and okonomiyaki sauce. Both bottles should come with a small squirt opening. I like to use these to create a cross-hatch pattern all the way across the top of the okonomiyaki. Add some benishoga and scallions for a little zing.
Finally, sprinkle generous amounts of katsuobushi and tororo kombu on top. Watch in amazement as both the katsuobushi and kombu dance from the steam. Fun!
Enjoy with cold sake or beer. Seriously, the saltiness and oiliness go perfectly with cold sake or beer.
 |
| Sake not optional. |
Namu amida butsu, itadakimasu!
 Print This Recipe


